China Swivel Joint Supplier for Construction Machinery
Keep hydraulic circuits connected while the upper and lower structures rotate.
Send the machine model, swivel-joint number, port layout, or photos of the old unit. We check whether a complete assembly, seal kit, or service-parts route is available for your application.
- Excavator and rotating-equipment center-joint inquiries
- Matching by part number, machine, ports, and dimensions
- Complete assembly and verified repair-option checking
- One-piece service demand and repeat supply
Mark every hose before removal. A clear circuit map is worth more than a photo of disconnected hoses with no labels.
Confirmed At
Port Level, Not Port Count
Everything You Need to Source a Center Joint
Identify the component, map the circuits, compare repair routes, and prepare a complete inquiry. Jump to any step.
Replacement Challenges
Port count alone is not identification
Supply Routes
Five ways to start your inquiry
Know the Component
Center joint, swing motor, or seal kit
Matching Guide
Photograph, label, measure, and map
Passages & Ports
Map every circuit top to bottom
Applications
Excavators and rotating equipment
Brand & Model Coverage
Search by machine and reference
Assembly & Repair Options
Choose after hard-part inspection
Confirmation Process
Six steps to port-level confirmation
Leakage & Diagnosis
External leak vs internal bypass
Installation & Cleanliness
Preserve the port map, stay clean
Old & Custom Models
Routes when no number exists
Order Quantities
Service, dealer batch, OEM program
Available Products
Browse by machine and reference
Inspection & Testing
Passage-level test evidence
Why Work With Us
Match the internal route
Packing & Protection
Plugged ports, protected surfaces
Warranty Support
Evidence that keeps claims factual
FAQs
Selection and repair questions
Related Categories
Seal kits, swing motors, bearings
Send Your Inquiry
Send a number or port map, reply within 24h
Port Count Alone Does Not Identify a Center Joint
Two joints can show the same visible ports yet differ in internal passage order, port size, mounting, shaft length, seal grooves, or pressure circuits.
One model, multiple configurations
Serial range, undercarriage, blade, dozer circuit, attachment piping, and machine version can change the center-joint assembly.
Hose positions were not recorded
Once hoses are removed, similar ports are hard to map. Incorrect reconnection can create unsafe or abnormal machine behavior.
External leakage is treated as the only failure
Internal leakage between passages can cause travel weakness, drift, heat, or pressure loss without any oil appearing outside.
A seal kit is ordered for a worn hard part
New seals cannot restore a shaft with scoring, corrosion, wear steps, or damaged bores. Disassembly inspection decides whether hard parts are serviceable.
A visually similar joint is installed
Different internal port routing makes a similar-looking joint unsuitable. Match the complete reference and circuit arrangement.
Contamination from the failure remains
Damaged seals release debris. Installing a replacement without cleaning the circuit can damage the new joint and other components.
Label Every Hose Now, Thank Yourself at Installation
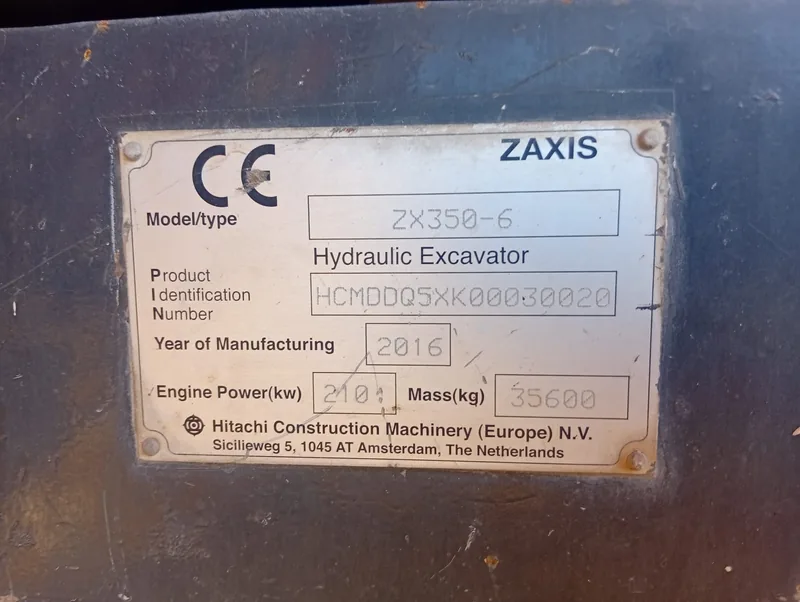
Photograph the installed joint and mark each hose and port with durable labels before removal. The circuit map is the identification.
Start With the Evidence You Have
A part number, a bare machine model, or an unmarked old joint each opens a different route. Pick the one that matches your situation.
Center Joint, Swing Component, or Inline Swivel?
A center joint does not drive the swing motion. It provides a rotating hydraulic connection so circuits pass between machine structures without winding the hoses.
| Component | Function | Typical Location | Matching Focus |
|---|---|---|---|
| Hydraulic center swivel joint | Transfers multiple fluid circuits across rotating structures | Machine center between upper structure and undercarriage | Passage map, ports, mounting, dimensions, machine configuration |
| Inline hose swivel / rotary union | Allows rotation at a hose or single-line connection | Hose, attachment, reel, or tool | Media, pressure, thread, size, rotation, seal |
| Swing motor | Produces rotary power for upper-structure swing | Swing drive assembly | Hydraulic motor model, ports, brake, valve, gearbox interface |
| Swing bearing | Supports and guides upper-structure rotation | Between upper frame and undercarriage | Diameter, bolt pattern, gear, load, machine model |
| Swivel seal kit | Replaces specific dynamic and static seals | Inside a matched center joint | Joint number, revision, groove and hard-part condition |
Not sure which of these you need? Send a photo of the complete unit in place and we confirm the product category first.
Photograph, Label, Measure, and Map
Seven steps build an identification package strong enough for port-level confirmation. Work through them in order; skip nothing you still have access to.
Machine identity
Record the brand, full model, serial number, production year if known, and any special machine configuration.
You provide: Model, serial, year, configuration
We confirm: Which configurations the machine can carry
Identification numbers
Photograph labels, stamped numbers, casting marks, and previous order references. Note which physical part carries each number.
You provide: Number photos with their locations
We confirm: Reference validity and supersessions
Installed condition
Before disconnecting hoses, photograph the joint in place from several angles and mark each hose and port with durable matching labels.
You provide: Installed photos and labeled hoses
We confirm: The circuit arrangement as built
Removed-unit photos
Show the top, bottom, body, shaft, flange, mounting points, anti-rotation features, and every port group.
You provide: All-face photos of the removed joint
We confirm: Physical configuration candidates
Dimensions and connections
Record overall height, body and shaft diameters, mounting pilot, bolt pattern, port thread or flange details, and distances between reference faces.
You provide: Measured dimensions
We confirm: Dimensional match against the proposed joint
Circuit map
List each passage by port label, function, pressure direction, media, and the connection between upper and lower ports. Include drain, pilot, blade, travel, steering, air, grease, or auxiliary paths.
You provide: A passage-by-passage circuit map
We confirm: Internal routing against the machine circuits
Required service scope
State complete assembly, seal kit, selected internal parts, rebuilt option, or custom joint; include quantity and destination.
You provide: Scope, quantity, destination
We confirm: The supply route to quote
Map Every Circuit From Top to Bottom
The visible number of fittings may not equal the number of independent internal passages. Ports can be paired, plugged, used as drains, or routed through special internal paths.
| Field | Example Entry |
|---|---|
| Passage label | {P1} |
| Upper port | {Thread / flange / size / position} |
| Lower port | {Thread / flange / size / position} |
| Circuit function | {Left travel / right travel / blade / drain / pilot} |
| Media | {Hydraulic oil / grease / air / other} |
| Working / peak pressure | {Value} |
| Flow direction | {One-way / reversing / drain} |
| Special requirement | {Low leakage / low torque / seal material} |
Replacing? Copy the existing port labels and hose routing before disassembly. Designing new? Provide a hydraulic schematic and define which circuits see pressure simultaneously.
Rotary Hydraulic Connections for Construction Equipment
The machine class changes what the passage map must carry. Contamination, shock, duty cycle, and attachments belong in the application review.
Crawler excavators
Center joints transfer travel and undercarriage circuits while the upper structure rotates. Machine options change the passage arrangement.
Mini excavators and blade machines
Compact packaging plus blade or auxiliary circuits add configuration differences within the same model family.
Wheeled excavators and handlers
Steering, axle, stabilizer, blade, travel, and auxiliary circuits often need a more complex map than a basic crawler.
Cranes, drills, and work platforms
High-pressure hydraulics may combine with drains, air, water, grease, or electrical paths. Treat these as application-engineered rotary unions.
Forestry, demolition, special carriers
Contamination, shock loads, duty cycle, and extra attachment circuits should be declared up front.
Check your machine application
Tell us the machine, attachments, and circuits. We confirm whether a model-based replacement or an engineered rotary union is the right route.
No Oil Outside Does Not Mean the Joint Is Fine
Weak travel, drift, and heat can come from internal cross-port leakage that never shows a drip. Send the symptoms before replacing parts blindly.
Search by Machine and Swivel-Group Reference
Common inquiries cover the machine brands below and other verified applications. Brand is the first filter, never the final compatibility decision.
Model not listed? Add serial information, machine options, the complete joint number, and port-layout photos, and we run a manual check.
Choose After Inspecting the Hard Parts
The right route depends on what the teardown shows, not on price alone. A seal kit is only an answer when the shaft, bore, grooves, and bearing surfaces pass inspection.
Complete swivel-joint assembly
For missing joints, damaged hard parts, or when downtime favors replacement. Confirm which plugs, fittings, brackets, seals, and mounting parts are included.
Seal kit
Only after verifying the exact joint and inspecting hard parts. The kit must match the joint revision and fluid and temperature requirements.
Selected hard parts
Shafts, housings, covers, retainers, and bearings can be checked for some models. Provide teardown photos and dimensions.
Rebuilt or remanufactured joint
Ask what was inspected, machined, replaced, tested, and warranted, and whether a return core is required.
| Route | Suitable When | Confirm Before Ordering |
|---|---|---|
| Complete new replacement | Hard parts damaged or full assembly preferred | Part number, port map, included fittings, inspection |
| Genuine / original part | Original traceability required | Source, label, packaging, supersession, availability |
| Seal kit | Hard parts remain within serviceable condition | Joint number, revision, seal profiles and material, installation procedure |
| Rebuilt joint | A verified rebuild route is practical | Core condition, machining, replaced parts, test and warranty scope |
Undecided between a kit and an assembly? Send teardown photos of the shaft and bores; the surfaces decide.
From Machine Reference to Port-Level Confirmation
Six checks take an inquiry from a model name to a joint you can install without guessing.
Send machine and joint details
Model, serial, numbers, photos, fault description, scope, and quantity open the check.
You provide: Model, serial, numbers, photos, fault, scope
We confirm: Whether the evidence is enough to begin
Confirm the product category
Center joint, inline swivel, seal kit, or another swing-related component: the category is fixed before anything is compared.
You provide: Installed-position photos
We confirm: The correct product category to quote
Compare physical configuration
Mounting, dimensions, port groups, shaft and body details, and labels are compared against the candidate joint.
You provide: Dimensions and all-face photos
We confirm: Physical match of the proposed unit
Map critical passages
Circuit functions and upper-to-lower routing are verified wherever model references are insufficient.
You provide: The circuit map from your labels
We confirm: Passage routing against machine circuits
Review the proposed route
Assembly condition, included parts, evidence, lead time, packing, and warranty are reviewed before you order.
You provide: Your review and approval
We confirm: Final route, terms, and pricing
Confirm before shipment
Ordered reference, port protection, labels, and available inspection or test records are confirmed before packing.
You provide: Agreement on the record scope
We confirm: Identification and evidence before dispatch
Separate External Leakage From Internal Bypass
The two failure families need different evidence. Diagnostic evidence to send: symptom, machine position, affected function, pressure readings, leak location, fluid condition, repair history, photos, and video.
External leakage
Oil around the body, shaft, cover, plugs, or hoses can involve dynamic or static seals, damaged surfaces, loose fittings, pressure, or contamination. Clean the area and identify the exact leak path.
Internal cross-port leakage
Wear or seal failure lets flow pass between passages with no external drip. Watch for weak or uneven travel, behavior that changes with upper-structure position, drift, heat, or pressure loss.
Case, drain, or return problems
Restricted return, wrong hose routing, abnormal back pressure, or a connected component fault can overload seals or imitate center-joint symptoms.
Inspect before deciding
Use the machine service procedure and qualified technicians to check pressures, circuits, hoses, travel motors, and valves. Mark the upper-structure position during testing if symptoms change as the machine rotates.
Preserve the Port Map and Keep Every Passage Clean
A perfect joint installed against a wrong or dirty circuit fails like a bad one. Three stages protect the work.
Before removal
- Park and isolate the machine according to its service and safety procedure
- Relieve hydraulic pressure and clean the work area
- Photograph and label every hose and port
- Record joint orientation, brackets, anti-rotation points, and hose routing
Before installation
- Compare part number, dimensions, mounting, ports, and passage map
- Inspect hoses, fittings, filters, fluid, and connected components for debris or damage
- Keep protective plugs in place until each clean connection is ready
- Use specified seals, lubricants, fasteners, and tightening procedures
After installation
- Refill, bleed, and start according to the machine instructions
- Test at controlled load while checking every function, hose, fitting, and joint surface
- Rotate the upper structure through the required range; watch for hose strain, leakage, or pressure changes
- Stop immediately if ports appear crossed or unexpected movement occurs
Safety first: Crossed ports can create unsafe machine behavior. If any function responds unexpectedly, stop and re-check the map before continuing.
When No Current Part Number Is Available
Old machines, modified systems, and special rotary applications still have routes. Each needs its own evidence.
Superseding swivel-group number
Historical numbers often lead to a current reference. Send every number and label you can find.
Confirmed replacement
A dimensionally and hydraulically confirmed replacement, checked at port level rather than by appearance.
Seal or service parts
Seals or selected parts for the existing joint, after the hard parts pass inspection.
Rebuilt joint
A rebuild route once the teardown shows which surfaces can be restored.
Reverse engineering
From a sample and a complete circuit map, for joints with no surviving documentation.
New rotary-joint development
Multi-passage development for repeat demand, with defined passages, pressures, media, rotation, leakage, torque, mounting, life, testing, and validation responsibility.
A custom project needs more than an old sample: define every passage function, simultaneous pressures, and who validates the result.
Do Not Scrap the Old Unit Until the New One Is Confirmed
The old joint carries the dimensions, the port map, and sometimes the core value. It is your reference until the replacement runs.
Service Replacement, Dealer Batch, or OEM Program
No MOQ. One joint for a machine that is down gets the same port-level check as a program order.
One-piece service orders
A single joint is welcome. Service orders need strong identification so the machine goes back together once.
Mixed dealer orders
List one machine and joint reference per line. Labels map every unit back to its machine.
Repeat and OEM programs
Define revision, port map, labels, inspection, validation, packaging, and forecast quantity.
Browse by Machine and Joint Reference
Example references from commonly requested machines. Exact matching, condition, availability, and lead time are confirmed before quotation.
{Swivel Joint Product 01}
- Part number
- {Reference}
- Machine
- {Brand / Model}
- Product
- {Complete Joint / Seal Kit / Rebuilt}
- Passages
- {Verified count and functions}
- Connections
- {Verified summary}
- Key confirmation
- {Port map / dimensions / serial range}
{Swivel Joint Product 02}
- Part number
- {Reference}
- Machine
- {Brand / Model}
- Product
- {Complete Joint / Seal Kit / Rebuilt}
- Passages
- {Verified count and functions}
- Connections
- {Verified summary}
- Key confirmation
- {Port map / dimensions / serial range}
{Swivel Joint Product 03}
- Part number
- {Reference}
- Machine
- {Brand / Model}
- Product
- {Complete Joint / Seal Kit / Rebuilt}
- Passages
- {Verified count and functions}
- Connections
- {Verified summary}
- Key confirmation
- {Port map / dimensions / serial range}
Reference not listed? Most joints are confirmed case by case from the machine, number, and port map.
Verify the Joint, Ports, and Sealing Performance
A generic pressure-tested statement is not enough for a multi-passage joint. Ask for the actual test medium, pressure per passage, duration, simultaneous loading, rotation condition, allowable leakage, temperature, and acceptance criteria.
Part-number and label check
Ordered reference compared against the physical joint.
Appearance and workmanship
Body, shaft, and machined surfaces reviewed.
Dimensional inspection
Overall, mounting, shaft, body, and critical-port dimensions measured.
Port-thread confirmation
Threads and plugs checked against the port map.
Passage continuity
Circuit-map check of upper-to-lower routing.
Rotation and torque
Rotation or operating-torque observation where applicable.
Leakage and pressure testing
Static or dynamic testing per passage to an agreed method.
Cleaning and packing records
Port protection, quantity, and packing documented before dispatch.
Photos are placeholders; replace with real inspection evidence from your bench.
Match the Internal Route, Not Just the Outside Shape
Every claim below maps to a step you can see in the process above.
Category checking comes first
- Component separation: center joint, inline swivel, seal kit, and swing components are distinguished before quoting
- Multiple identification routes: machine, number, photos, dimensions, ports, and circuit maps all count as evidence
Confirmation goes to port level
- Passage documentation: circuit functions documented where model references are insufficient
- Repair decision support: complete assembly, seal kit, hard parts, and rebuilt routes compared honestly
Evidence and repeat orders stay controlled
- Defined test scope: inspection and testing agreed per order, not a generic badge
- Repeat-order control: reference, revision, labels, and packing information preserved
Keep Machined Surfaces and Open Passages Protected
Every open port is an invitation for contamination. Packing closes them all before the joint leaves the bench.
- Clean plugs or caps fitted to every port
- Shaft and mounting faces protected
- Corrosion and moisture control matched to the shipment
- Individual product labels and stable internal restraint
- Carton, pallet, or case selected for weight and destination
- Seal-kit profiles separated and identified
- Mixed orders mapped label by label to the packing list and machine reference
Keep the Port Map, Installation Record, and Fluid Evidence
Warranty terms depend on product condition and the order agreement. Good records make claims fast and factual.
Confirm before ordering
- Warranty period, scope, and exclusions for the quoted condition
- The claim procedure and required evidence
- What the coverage assumes about installation and fluid cleanliness
- Whether a return core or inspection is part of the process
If a problem occurs
- Stop operation where continued use is unsafe or damaging
- Send the order and joint number, machine and serial, installation date, and hours
- Provide the hose and port map, fluid and filtration information, and pressure findings
- Note the upper-structure position, leak location or affected circuits, with photos and video
- Include connected-system inspection results; do not open the joint unless the agreed process requests it
Replacement or repair is proposed based on the reviewed evidence and the agreed terms.
Send the Joint Details Before the Hoses Are Forgotten
The best time to send an inquiry is while the labels are still on the hoses. Start with whatever you have.
Category first, then ports, then a route
- We first verify the product category, identification, and port configuration
- We request only the missing details, with photo and labeling guidance
- A product route is proposed after the critical details are clear
- Reply within 24 hours, usually much faster
Direct Contact
Jeason
WhatsApp / Phone: +86-17701920885
Chat With JeasonRoom 118, Building 8, No. 138 Huicai Road, Tianhe District, Guangzhou, China
Swivel Joint Selection and Repair Questions
The questions that come up before almost every center-joint order.
01What does an excavator center swivel joint do?
It transfers hydraulic circuits between rotating and stationary parts of the machine so the upper structure can rotate without winding the connected hoses around the center.
02Is a center joint the same as a swing motor?
No. The swing motor creates rotation. The center joint provides rotating fluid connections for circuits passing between machine structures.
03Can the machine model identify the joint?
Sometimes, but serial range and machine options can change the joint. Add the complete part number and port-layout photos.
04Can two joints with the same port count interchange?
Not automatically. Internal routing, port size, mounting, dimensions, seals, pressure circuits, and machine configuration may differ.
05Should I replace the joint or install a seal kit?
A seal kit may suit a correctly identified joint with serviceable hard parts. Scoring, corrosion, wear, damaged bores, or deformation may require hard-part repair or a complete assembly.
06What are signs of internal leakage?
Weak or uneven functions, travel behavior that changes with upper rotation, drift, heat, or pressure loss without an external leak. Other system faults can cause similar symptoms.
07What should I do before removing the old joint?
Clean the area, relieve pressure safely, photograph the installed joint, and label every hose and port so the circuit map is preserved.
08Can you identify a joint from photos?
Photos can narrow the options, especially with machine and number information. Measurements, port details, and a circuit map may still be required.
09What is needed for a custom rotary joint?
Define every passage, media, pressure, flow, temperature, rotation, leakage, torque, mounting, material, life, testing, quantity, and validation requirement.
10How should I compare quotations?
Compare part reference, condition, included fittings, port map, dimensions, seal and material information, inspection and test scope, packing, lead time, and warranty.
Question not covered? Send it with your machine model and Jeason will answer both at once.
Continue With the Correct Hydraulic or Swing Component
If the center joint is not the failed part, these neighboring categories carry the same checking process.
Swivel Seal Kits
Matched dynamic and static seals for correctly identified joints with serviceable hard parts. Kits are confirmed against the joint number, revision, and groove geometry, never by port count.
View Seal KitsSwing Motors
Hydraulic motors, brakes, and valve components.
View Swing MotorsSwing Reduction Gears
Mechanical swing gearboxes for the upper structure.
View Swing GearboxesSwing Bearings
Slewing rings and ring gears.
View Swing BearingsTravel Motors
Hydraulic track-drive motors.
View Travel MotorsHydraulic Hoses & Fittings
Machine circuit connections.
View Hoses and FittingsHydraulic Valves
Pressure, directional, and flow-control products.
View ValvesRotary Unions
Application-engineered inline or multi-media rotary connections.
View Rotary Unions